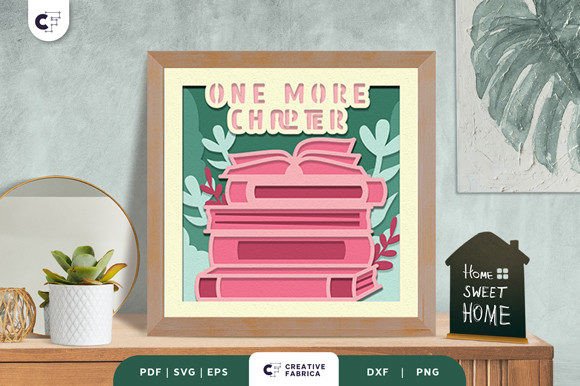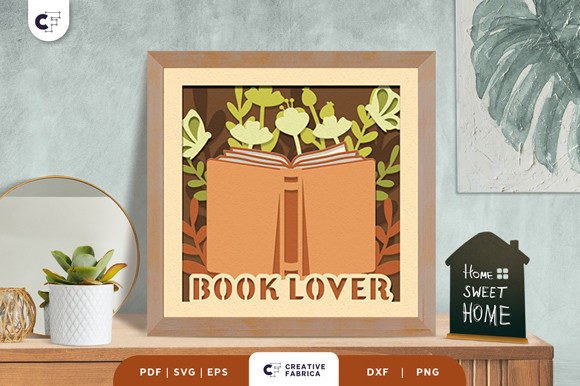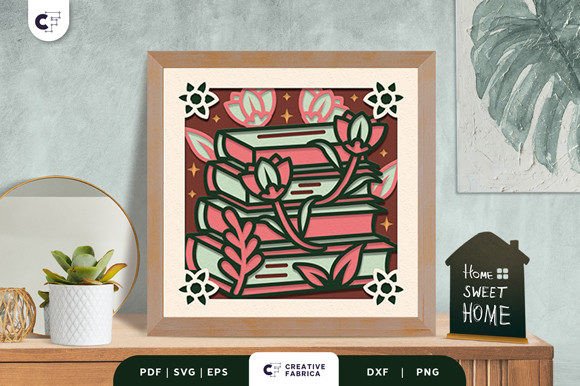
Creating a Floral Stack of Books 3D Shadow Box: A Guide to Layered Paper Art
In the world of handmade gifts and home decor, few things capture the imagination quite like a 3D shadow box. These intricate displays transform flat paper into dimensional art, offering a unique way to celebrate personal passions. One of the most beloved themes for this craft is literature itself. By creating a Floral Stack of Books 3D Shadow Box, you are not just making a decoration; you are crafting a tribute to the warmth of reading and the beauty of storytelling. This guide will walk you through the process of understanding, assembling, and appreciating this six-layer papercut masterpiece.
The Allure of Literary Craftsmanship
Books have long been symbols of knowledge, escape, and comfort. For many, a stack of books represents a sanctuary—a place where one can disconnect from the noise of daily life and immerse themselves in different worlds. When you translate this concept into a physical craft project, you create something tangible that embodies those feelings. The Floral Stack of Books design takes this further by integrating delicate floral arrangements with the geometric structure of stacked volumes. This combination softens the rigid lines of the books, adding an organic, elegant touch that appeals to both bookworms and flower enthusiasts alike.
This type of project is particularly relevant in modern creative circles because it merges traditional analog hobbies—like cutting and gluing—with digital precision tools. It allows creators to produce professional-looking results at home, making it an accessible yet sophisticated activity for hobbyists, educators, and small business owners looking to offer unique products.
Understanding the Digital Template
Before you begin cutting, it is essential to understand what you are working with. The core of this project is the Floral Stack of Books 3D SVG. An SVG (Scalable Vector Graphics) file is a digital blueprint that tells your cutting machine exactly where to cut. Unlike raster images (like JPEGs or PNGs), which are made of pixels and can become blurry when enlarged, vector files use mathematical equations to define shapes. This means you can scale the design up or down without losing any detail, ensuring that the intricate floral patterns remain crisp regardless of the size you choose.
When you purchase or download this template, you typically receive it in multiple formats to suit different needs:
- SVG: Ideal for Cricut, Silhouette, and other electronic cutting machines.
- PNG: Useful for printing as a reference image or for use in graphic design software.
- PDF: Great for viewing the layout on a screen or printer-friendly instructions.
- EPS & DXF: Compatible with various vector editing programs like Adobe Illustrator or Inkscape.
Knowing these formats helps you prepare your workspace effectively. If you are using a cutting machine, the SVG or DXF file is your primary tool. If you are hand-cutting, the PDF or PNG serves as your visual guide.
Material Selection and Preparation
The quality of your final shadow box depends heavily on the materials you choose. While the digital file provides the shape, the cardstock provides the substance. For a 3D effect, you need paper that has enough weight to hold its shape but is flexible enough to be layered precisely.
Cardstock Recommendations:
Standard printer paper is too thin and will collapse under its own weight. Instead, opt for cardstock ranging from 65 lb to 110 lb (approximately 176 gsm to 300 gsm). Heavier cardstock holds the layers apart more effectively, enhancing the 3D depth. Additionally, consider the color palette. Since the design features flowers and books, earthy tones, pastel hues, or classic cream and green combinations work beautifully. Remember that the actual color may vary slightly due to lighting and the specific brand of paper you use, so it is wise to test a small piece first if you are aiming for a precise aesthetic match.
Step-by-Step Assembly Guide
Assembling a six-layer 3D papercut requires patience and precision. The design consists of six distinct parts cut from a single template, each representing a layer of depth. Here is how to bring your Floral Stack of Books to life:
1. Cutting the Layers
Start by loading your cardstock into your cutting machine. Ensure the blade depth is set correctly for your paper thickness to avoid cutting through the backing mat unnecessarily. Cut all six layers carefully. If you are hand-cutting, use sharp scissors or a craft knife on a self-healing mat. Precision is key here; jagged edges will disrupt the clean look of the final assembly.
2. Organizing the Pieces
Once cut, lay out your pieces in order. Label them Layer 1 through Layer 6, starting from the background to the foreground. This step is crucial because the overlapping nature of the design means that misplacing even one layer can ruin the illusion of depth. The floral elements should align seamlessly with the book spines and pages in each subsequent layer.
3. Gluing and Layering
Now comes the construction phase. You have two main options for adhering the layers: glue or double-sided tape.
- Glue: Use a moderate amount of liquid glue or a glue stick. Apply it sparingly to the back of each layer, focusing on the edges and key structural points. Too much glue can warp the paper or seep through, ruining the visual clarity.
- Tape: Double-sided foam tape is excellent for 3D projects because it adds extra height between layers, enhancing the shadow box effect. Regular double-sided tape works well for flatter sections.
Important Tip: Wait for each layer to set before adding the next. This prevents the paper from shifting and ensures that the alignment remains perfect. Start with the largest background piece (Layer 1) and build up to the smallest, most detailed foreground piece (Layer 6).
4. Final Placement
Once all layers are assembled into a single cohesive unit, you are ready to frame it. Place the stack onto a framed base. Many shadow boxes come with a deep frame to accommodate the thickness of the paper stack. Secure the assembly gently, ensuring it sits flat and straight. The result is a stunning, multi-dimensional artwork that catches light and shadow beautifully.
Why This Project Matters Today
In an era dominated by digital screens and instant gratification, crafts like the 3D shadow box offer a necessary counterbalance. They encourage mindfulness, fine motor skill development, and a sense of accomplishment. For educators, this project can be a fantastic way to teach geometry, spatial awareness, and patience. For businesses, creating these items offers a niche market opportunity. Personalized gifts featuring a recipient’s favorite literary genres or hobbies are highly valued in the handmade economy.
Furthermore, the Floral Stack of Books serves as versatile home decor. It fits perfectly in a library, a study, a child’s bedroom, or even a cozy reading nook. It acts as a conversation starter, reflecting the owner’s love for literature and nature. Whether you are making it for yourself as a relaxing weekend project or crafting dozens to sell at local markets, the satisfaction of creating something beautiful from simple paper is unmatched.
Common Misconceptions and Tips for Success
One common misconception is that 3D papercutting is only for experts. While practice helps, the structured nature of SVG templates makes it beginner-friendly. As long as you follow the layer order and take your time with the glue, you can achieve professional results.
Another assumption is that you need expensive equipment. While a cutting machine speeds up the process, skilled crafters can achieve similar results with high-quality hand tools. The difference lies primarily in speed and uniformity, not necessarily in the artistic outcome.
Finally, remember that imperfections add character. If a tiny piece tears or a glue mark is visible, do not despair. Often, these minor flaws go unnoticed in the final display, especially when viewed from a distance. Embrace the handmade nature of the project.
Conclusion
Creating a Floral Stack of Books 3D Shadow Box is more than just a craft; it is an act of creativity that honors the joy of reading. With the right template, materials, and attention to detail, you can produce a gorgeous gift or a cherished piece of home decor. Whether you are a seasoned papercutter or a curious beginner, this project offers a rewarding blend of technical precision and artistic expression. So, gather your cardstock, fire up your cutter, and start building your own literary landscape today.